Paleo Breadsticks Recipe
(gluten-free, dairy-free, refined sugar-free, grain-free, nut-free)
I have literally just been doing a happy dance in my kitchen because of these breadsticks and its all thanks to my new favourite ingredient – Cassava Flour!
I have been making gluten-free breadsticks for Mila for a while, but because of the gluten-free grain flours I used, I could not eat them (grains do not agree with me).
But now… oh happy days… I have paleo breadsticks!
These make a great snack for on the beach, at a picnic and in school lunchboxes with a few of the dips from my cookbook Mila’s Meals: The Beginning & The Basics.
Key: gluten-free, sugar-free, dairy-free, grain-free, paleo, vegetarian
Prep Time: 1 hour
Cooking Time: 25 – 35 minutes
Makes: 20 long breadsticks
INGREDIENTS
(t. = teaspoon; T. = tablespoon, C. = cup)
DRY INGREDIENTS
[unordered_list style=’circle’ number_type=’circle_number’ animate=’no’ font_weight=”]
- 275 g Cassava Flour
- 2 T. psyllium husk
- 1 t. dry active yeast
- 1 t. guar gum
- 1 t. Desert or sea salt
[/unordered_list]
WET INGREDIENTS
[unordered_list style=’circle’ number_type=’circle_number’ animate=’no’ font_weight=”]
- ¼ C. organic olive oil
- 1 T. raw honey
- 1 free-range/organic egg
- 1 ¾ C. warm filtered water
[/unordered_list]
ADDITIONAL INGREDIENTS
[unordered_list style=’circle’ number_type=’circle_number’ animate=’no’ font_weight=”]
- 1 C. boiling water (for proofing)
- 1-2 C Cassava Flour (for kneading)
- 1 egg, beaten (for the glaze)
[/unordered_list]
METHOD
[ordered_list]
- In a large mixing bowl, combine the dry ingredients.
- In a separate small bowl, whisk together the olive oil, honey and egg.
- Pour this into the dry mix.
- Fit your electric handheld beater with the dough hook, place it in the bowl and turn it on.
- Slowly add the warm water while beating.
- Run the beater, while stirring, for 2 minutes.
- Place the mixing bowl in a warm, draft-free place with a bowl of boiling water alongside it (I use my oven – which is not turned on!)
- Allow the dough to proof for 30 minutes.
- While the dough is proofing, grease 2 baking trays with coconut oil.
- Remove the mixing bowl, and turn the oven on to 200°C (400°F).
- Dust your working surface with the additional cassava flour.
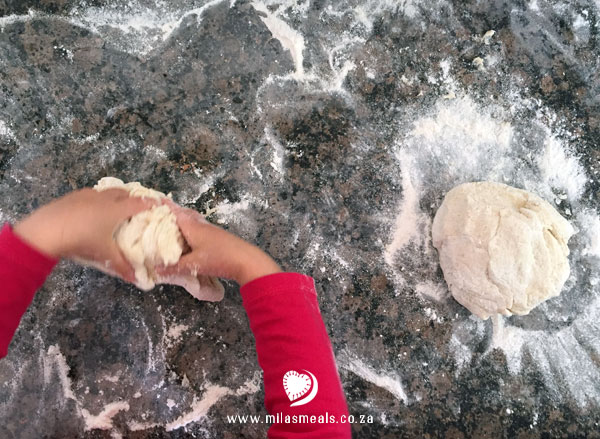
- Divide the dough into 4 pieces and knead each one in the additional flour. The dough is quite wet, so keep adding additional flour while kneading until it no longer sticks to your hands.
- Break off a small handful of dough and roll into breadsticks. Mine were approximately 1cm in diameter.
- Place the rolled breadstick onto the baking tray and repeat the rolling process with the remaining dough.
- Brush the breadsticks with the additional beaten egg.
- Place the baking trays in the oven for 25 – 35 minutes.*
- Leave the breadsticks on the baking tray to cool – then enjoy! (Mine didn’t even get a chance to get dipped into anything!)
- Store in a sealed container. They will stay fresh for 2 days. If you would like to keep them for longer, store them in the freezer and defrost as needed.
[/ordered_list]
*Please note that all ovens are different so the baking time will vary.
The oven I used when creating the recipes for Mila’s Meals: The Beginning & The Basics died 🙁 and the replacement one and I are not friends! In my oven (which really is not the greatest) the following times applied:
25 minutes – for breadsticks that were crispy on the outside and soft on the inside (Mila likes them like this!)**
35 minutes – for breadsticks that were crispy all the way through.
I would set your oven timer to 20 minutes and then start watching and testing. You want to make sure that they are not getting burnt on the outside.
**I prefer the flavour of the breadsticks baked for 25 minutes – but I like them crispy all the way through. So I dehydrated them in an oven much like you would rusks – overnight at 50°C (my oven’s lowest setting) with the door slightly ajar
Ready for the oven!
This is a great one to make with the kids!
If there’s one thing my fairly fussy food intolerant daughter likes to eat… it’s dough!
Ta da!
Health Riot were so impressed with this recipe that they made a video out of it 🙂
These bread-sticks will be great dunked into various dips – recipes for which can be found in my book Mila’s Meals: The Beginning & The Basics:
- Hummus
- Veggie Spread
- Chicken Liver Pâté
- Snoek Pâté
- Guacamole
- Chocolate Spread or Choc-Nut Spread


More about my new favourite flour…
Introducing Cassava Flour
It’s got the same fluffy texture and mild neutral flavour of ordinary wheat flour; but no GMO, no allergenic wheat, gluten, grains or nuts.
Why do I love it so much?
While being gluten-free, sugar-free and dairy-free initially worked for Mila and myself (in that my eczema disappeared and so did Mila’s green poo’s) the added stress that later transpired in our lives brought back my eczema and Mila often suffered from constipation. I realized that both our symptoms were worse after eating grains. So while I knew about the Paleo eating protocol (and had sworn I would never cut out another food group from my diet), I found myself and Mila doing just that!
And so many of the recipes that had lovingly made their way into my book, were no longer made. 🙁 While there were alternatives such as almond flour and coconut flour, I haven’t baked much with these due to the cost of almond flour, and my inability to get anything to be edible with only coconut flour!
And then in October I saw the announcement on Faithful-To-Nature’s Facebook page that Cassava Flour had arrived in South Africa! I immediately ordered some and I have been busy re-testing/ re-creating my recipes using it ever since.
Some of the highlights:
[unordered_list style=’circle’ number_type=’circle_number’ animate=’no’ font_weight=”]
- Gluten-free baking requires a combination of gluten-free flours to achieve an edible density and flavor. But, Cassava Flour substitutes 1:1 with ordinary wheat flour in many of your favorite recipes. One flour per recipe! It is, however, a thirsty flour so you may have to adjust liquid quantities.
- Grain-free baking meant you had to use almond flour or coconut flour (expensive and dry!). And what about those with nut-allergies? Cassava Flour is GMO‑free, Gluten‑Free, Grain‑Free, and Nut‑Free!
- And… very importantly – its tastes amazing
[/unordered_list]
Find this recipe & 15 others in the Lunch Box Meal Plan!
WHAT IS INCLUDED IN THIS MEAL PLAN?
- 5-day Meal plan with what do add to the lunch box on what day
- 16 recipes
- Shopping list for all ingredients needed
*BONUS*:
- The ‘Shop My Pantry – Lunch Box Edition’ Shopping Guide! A clickable printable shopping list with all Mila’s favourite ready-made gluten-free, dairy-free and refined sugar-free Lunch Box Snacks.
Want over 100 recipes like this one?
[/action]


